
Modding Tutorial – Diamond
Firstly, add the new product type Diamond into Product_Types.DBF, using the same method you have learned in the previous tutorial for adding Blackberry.
As you have probably figured out, the new product type Diamond should be added under the RAW product class. The below spreadsheet snapshot shows how the new record will look like.

Then open the file Natural Resources.DBF and add a new record to define the new natural resource Diamond.
There are a number of variables you have to define for a new natural resource type. To see the detailed descriptions of these variables, click here to read the page “Advanced Modding – Natural Resources”.

Modding the graphics
1) Product Image
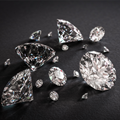
The next step is to add the image of Diamond into the game. The product image must be in PNG file format and have a size of 120×120 pixels, such as the example image shown below.
Place the product image file in “MOD Kit\Images\Products\” folder, and run the file PACK.BAT in the same folder to pack all the image files in the folder into a single resource file.
Diamond.PNG
2) Bitmap on the Map
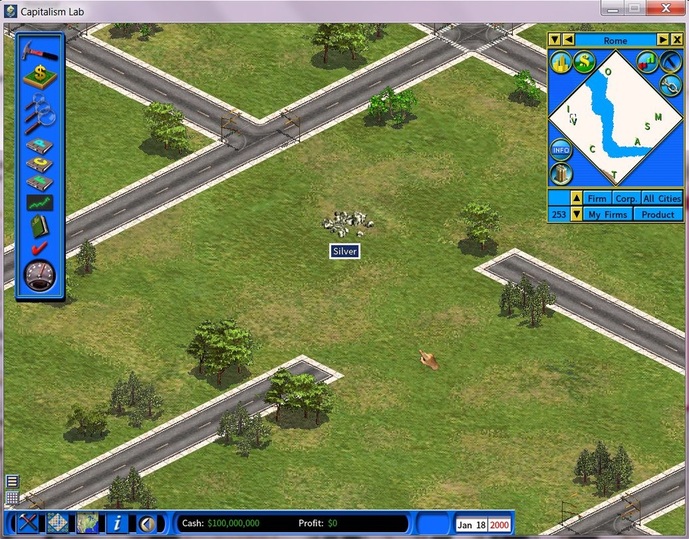
Besides the product image, the game also needs to load bitmaps of Diamond for displaying on the map. Such bitmaps that represent natural resource sites on the map are stored in the “MOD Kit\Images\Natural_Resources” folder. The following shows how a natural resource site of Silver looks like on the map.
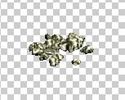
You will have to supply the bitmap file for the natural resource in PNG file with transparency, like below.
And the natural resource image must be situated at the center of the PNG bitmap file, otherwise it may be displayed incorrectly.

The tricky part is to set the bitmap background as transparent so that the game can blend the bitmap with the map properly without displaying the white background. If you are not experienced with this process, you may search on the Internet for articles or YouTube videos that teaches how you now to set the background of an image to transparent and save it as PNG file.
When you edit it in an image editor, it may look like the following with the background being transparent.
Since there are 3 zoom levels in the game, allowing the user to zoom in or out the map, the game also needs 3 bitmaps of different sizes for each natural resource type. Under the “MOD Kit\Images\Natural_Resources” folder, you will find the following files and subfolders.
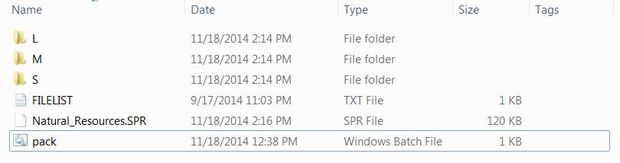
The subfolders “L”, “M”, and “S” contains raw natural bitmap files for the Large, Medium and Small zoom levels.
Now let’s access the “L” subfolder and you will see a PNG file for each type of natural resource, as follows.
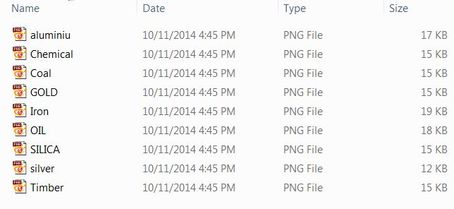
Again, below is how the bitmap for Silver looks like. The MOD tool that you will use later will automatically crop the bitmap to the proper size, thus the size of the background does not matter. e.g. If you use a PNG bitmap of 800×600 size where the majority of the bitmap is the background, when you use the MOD tool to build the MOD resource file, it will automatically crop off any unnecessary background parts and only save the needed natural resource bitmap to the MOD resource file.

Building MOD Resource file
After you have successfully created the bitmaps for the Large, Medium and Small versions of the new natural resource, you can now run the PACK.BAT file from the “MOD Kit\Images\Natural_Resources” folder to build a single bitmap resource file for all natural resource types.
The resulting file is called “Natural_Resources.SPR”
If you are not familiar with the process of creating graphics with transparency and you are looking for a quick-and-dirty way to add new natural resources, you may simply duplicate the PNG files of an existing natural resource and rename them as the new natural resource. (e.g. duplicate the file SILVER.PNG and rename it as DIAMOND.PNG under the subfolders “L’, “M”, and “S” respectively)
Finally go back to the “MOD Kit” folder and run the PACK.BAT file there to compile all resource files into a single MOD file and copy it to the “MOD” folder under your Capitalism Lab folder.
If this is your first time building a MOD for Capitalism Lab, please see this web page for more details about how to set up the MOD file properly for Capitalism Lab to use. Click this link to read the details: How to Make a MOD.
Now run the game and set the game to load your newly created MOD and you will be able to set up a mine for extracting diamonds.
Link: How to Use a MOD
You may download the MOD tutorial files described above by clicking here.